
Knowledge Graph: A beginner’s guide to Ontologies
As the world becomes increasingly data-driven, ontologies and knowledge graphs play a crucial role in organizing vast amounts of information, enabling efficient data retrieval, and fostering more informed decision-making. In this beginner’s guide to ontologies and knowledge graphs, we will provide you with a comprehensive introduction to these essential concepts, helping you understand their significance and practical applications. By the end of this guide, you will have gained valuable insights into how ontologies and knowledge graphs can be used to represent complex relationships and organize information in a meaningful way. Let’s dive in and explore these fascinating topics together.
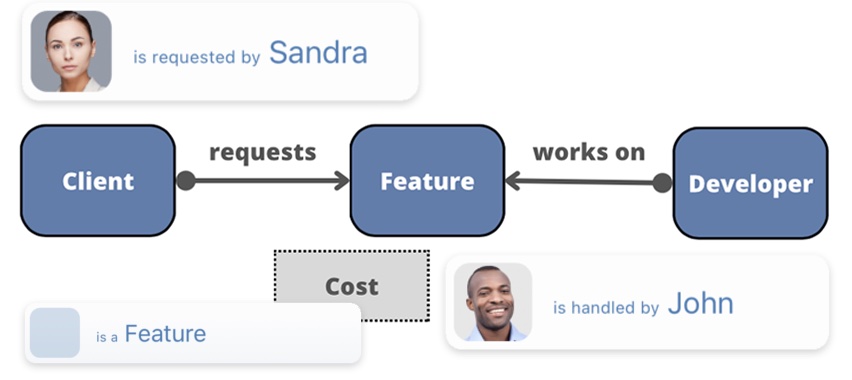
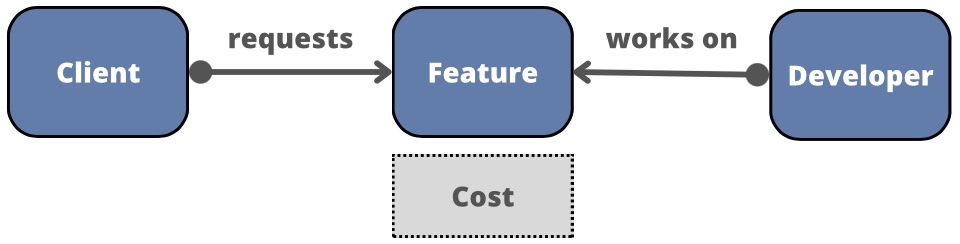
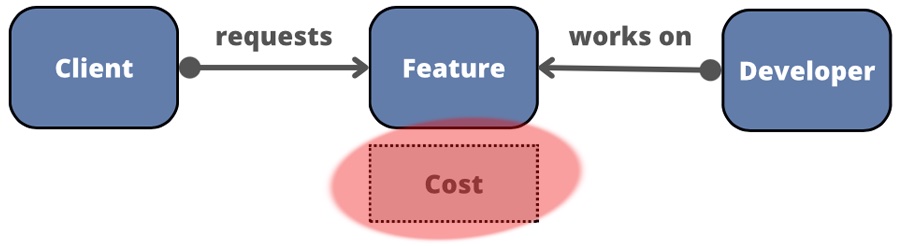
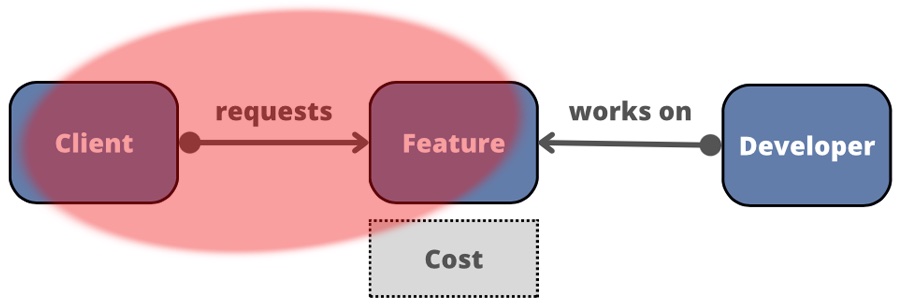
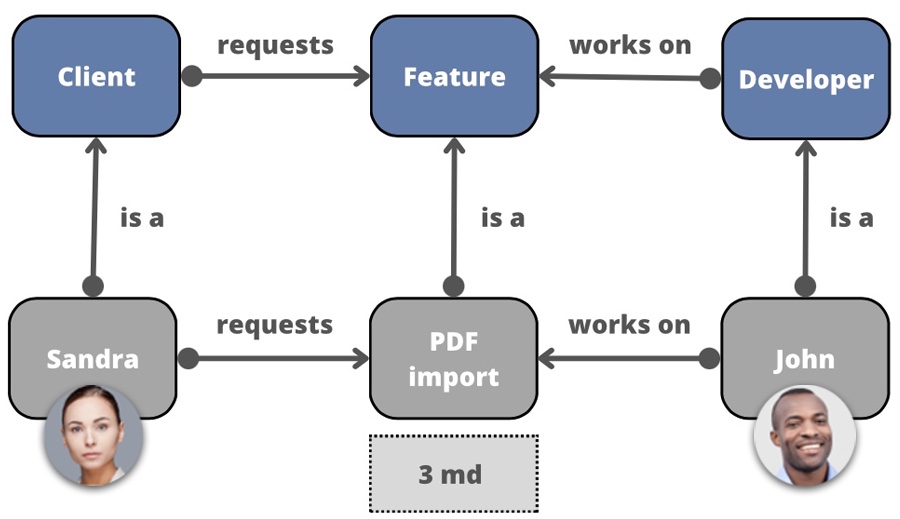
Since this article is a beginner’s guide to ontologies, we will examine a simple and straightforward example: a company develops a software. The company’s clients request new features for the software. In-house developers work on implementing these features. Each feature is characterized by its cost.
We will use KeepLink to build this simple ontology. KeepLink is an app that let you capture, connect, and organize every aspect of your life in a simple, yet powerful knowledge graph.
An ontology is a structured way to represent concepts and their relationships. A knowledge graph visually displays these interconnected concepts. Knowledge graphs rely on ontologies to organize data, making it more understandable and accessible.
Here are some basic terms related to ontologies:
- Concept: An abstract idea representing a category or class of objects. In KeepLink, these are called Types. In our example, we have three types: Client, Feature, and Developer.
- Instance: A specific occurrence of a concept, such as an individual client or feature. KeepLink refers to instances as Items.
- Property: A characteristic or attribute describing a concept or instance. In our example, we’ll focus on one property: the Cost of a Feature.
- Relation: A connection between two concepts or instances. In KeepLink, these are called Links. We have two types of Links in this example: “requests” and “works on“.
There are more advanced terms used in ontologies, such as axioms, subclasses, and equivalence relations. However, these concepts are outside the scope of this beginner’s guide.
Setup
If you haven’t started using KeepLink, download it for free from the App Store. Familiarize yourself with its basic features, such as navigation, adding, and linking items together, by exploring the various tutorials.
If you don’t own an iPhone, KeepLink can also be installed on an iPad. So far, KeepLink does not run on other operating systems.
To begin creating our ontology, we must first change KeepLink to Designer Mode. To do this, open the Settings, tap on KeepLink mode, and select the “Designer” option.

Step 1: Build the types
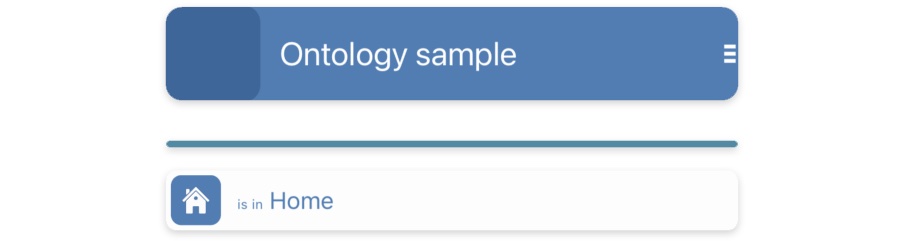
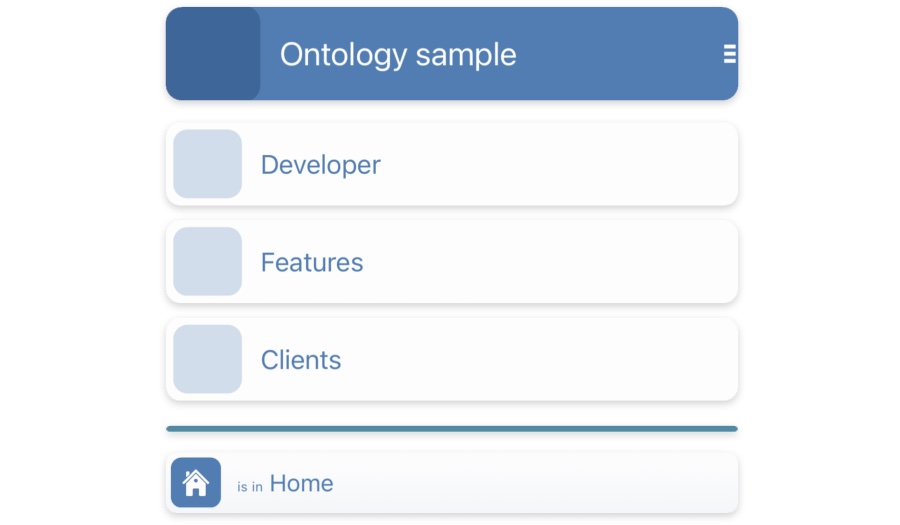
Tap Home to open your Home list. Add a new item and name it “Ontology Sample” or any other title that is meaningful to you. Next, open this new item where we will add our Types.
Add a new item within “Ontology Sample” and label it as “Client.” There is no need to select an image for this item. Now, open “Client” and access its menu. Choose the “Display properties” option.
If “Display properties” is not visible in the menu, please revisit the Setup and ensure that KeepLink is switched to “Designer” mode.
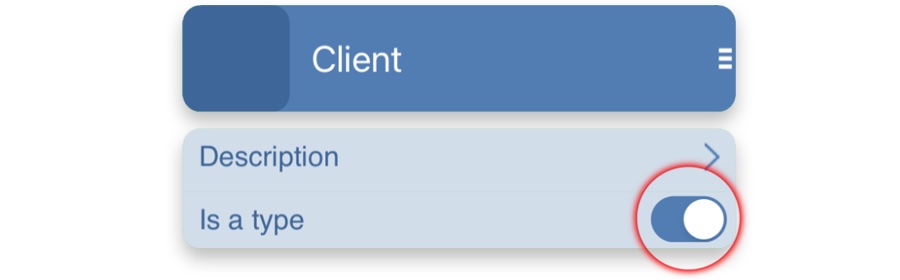
Enable the “Is a type” toggle to indicate to KeepLink that “Client” is a Type/Class. Now, swipe right on “Client” to return to the “Ontology Sample” list.
Repeat the same process you used for “Client” to create the other two types: “Feature” and “Developer”. Make sure to enable the “Is a type” toggle for each of them as well.
Step 2: Build the properties
Now let’s explore adding properties to the types we’ve just established. We want each “Feature” to have an associated cost, so we’ll add a property called “Cost” to the “Feature” type.
Swipe the bottom bar to the right and open “Tools”, then “Design” and “Properties”.
If you don’t find “Design” among the list of tools, please refer back to the Setup instructions and make sure to switch KeepLink mode to “Designer.”
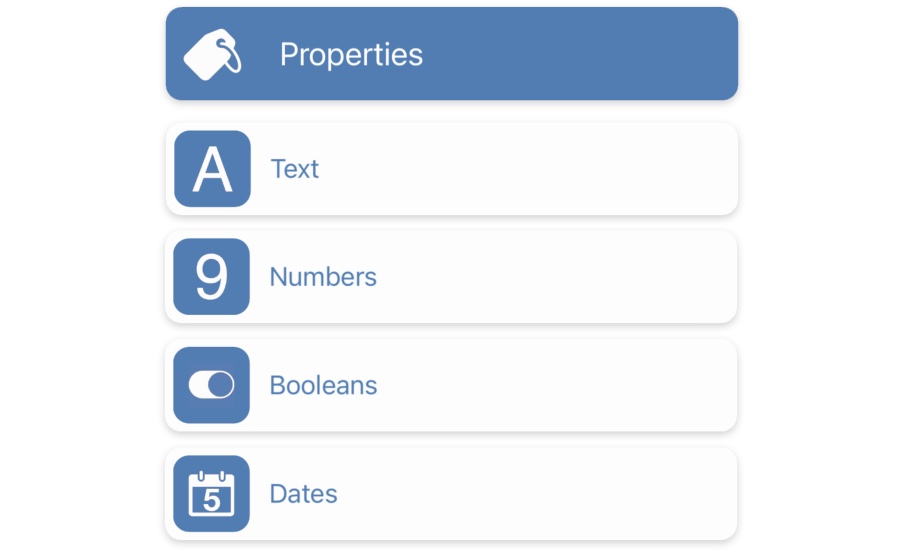
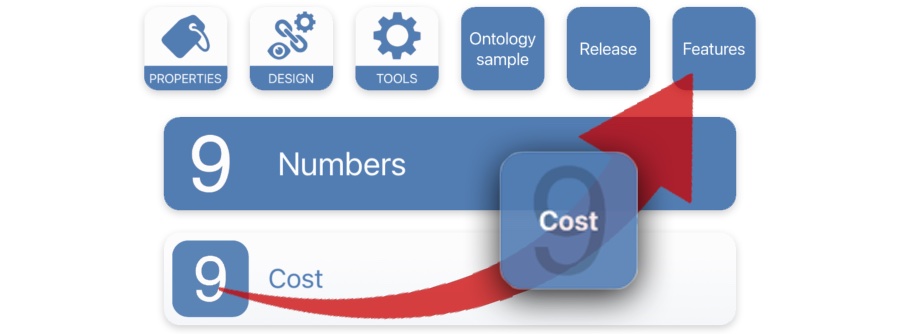
Since “Cost” is a numeric property, open the “Numbers” category and tap  to create a new numeric property. Label it as “Cost”. To associate “Cost” with the type “Feature”, we will use a link.
Swipe the top bar down to reveal the timeline. Scroll through the timeline until you find “Feature”. Now, touch and hold the thumbnail of “Cost”. When it becomes bigger, drag it onto “Feature” to create the link.
KeepLink connects the 2 items together with the link “defines”.

Why did KeepLink select “defines” as the link between “Cost” and “Feature”? The reason is that KeepLink itself is built upon an ontology. According to this underlying ontology, the relationship between a Property and a Type is represented as “defines” (meaning that a property defines a type).
Keep in mind that you have the option to customize numerous attributes for your properties. However, for the purposes of this tutorial, we will stick to the default values for all of them
Step 3: Build the links
Creating new types of links is quite similar to creating new properties. The first link type we’ll establish is called “requests.”
Swipe the bottom bar to the right and open “Tools,” followed by “Design” and “Links.” Tap to add a new link type and name it “requests.” This link will originate from “Client” and connect to “Feature.” Locate “Client” in the timeline and link “requests” to “Client.”

KeepLink connects the 2 items together with the link “starts from”.

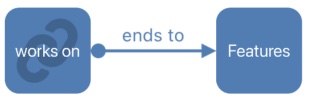
Now link “requests” to “Feature”. This time, KeepLink uses the link “ends to”.

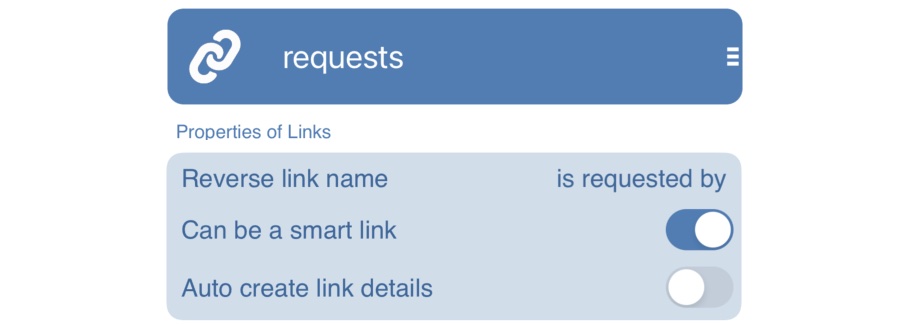
Your link is now set up! Next, let’s define its reverse name. The reverse of “a client requests a feature” would be “a feature is requested by a client.”
Open the “requests” link and set the attribute “Reverse link name” to “is requested by.” Keep the other options as they currently are.
Swipe right on “requests” to return to the previous list. Repeat the process you used for creating the “requests” link to establish the second link: “works on.”

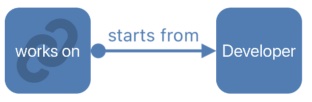
Tap to add a new kind of link. Name it “works on”. This link starts from “Developer”. Locate “Developer” in the timeline and link “works on” to “Developer”.
Now link “works on” to “Feature”. This time, KeepLink uses the link “ends to”.
Open “works on” and set the attibute “Reverse link name” to “is handled by”. Leave the other options as they are.
Congratulations! You have just completed defining your ontology. Types, properties, and links have all been established. Now it’s time to have some fun and explore how everything works together.
Play with your ontology
An instance refers to a particular occurrence of a Type. Let’s put our ontology into action and see how instances operate within it.
Sandra’s request
Open “Home”, then “Ontology sample” and “Client”. Tap to add a new client and name this instance “Sandra”.
By adding “Sandra” to the “Client” list, you have actually connected “Sandra” to “Client” with an “is a” link. “Sandra” is an instance of “Client,” which means Sandra is a client.
Swipe “Client” to the right to return to the previous list and open “Feature”. Tap to add a new feature and name it “PDF import”. This new feature would allow the software that the company sells to import PDF files.
Now it’s time to indicate that this new feature, “PDF Import,” is requested by Sandra. Link “PDF Import” to “Sandra.”
Since “Sandra” is a client and “PDF import” is a feature, KeepLink connects these two items with a “requests” link.

As illustrated through this example, KeepLink effectively uses your ontology to accurately choose the proper type of link.
John does the job
Swipe “Feature” to the right to return to the previous list and open “Developer”. Tap to add a new developer and name this instance “John”. John is a developer at the software company.
Now link “John” with “PDF import”. KeepLink connects these two items using a “works on” link.

KeepLink, once again, selects the appropriate type of link based on your ontology.
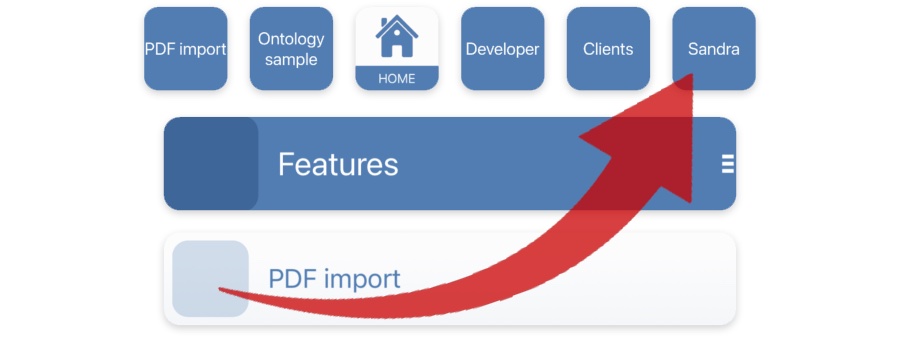
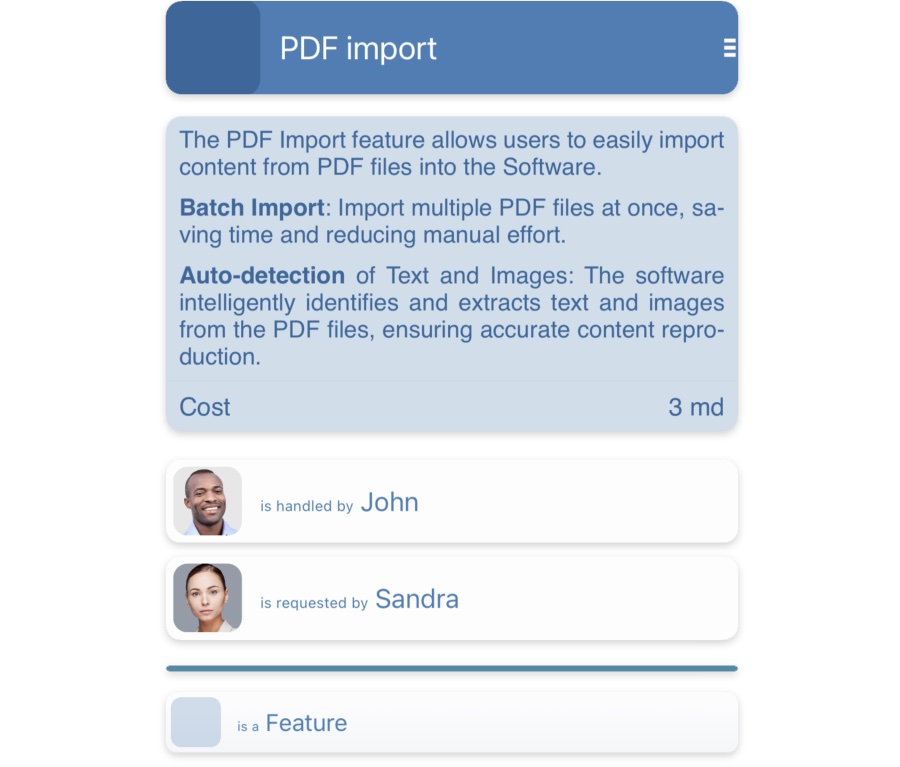
In the timeline, tap on “PDF Import.” The item will open, displaying a list of all the items linked to it.
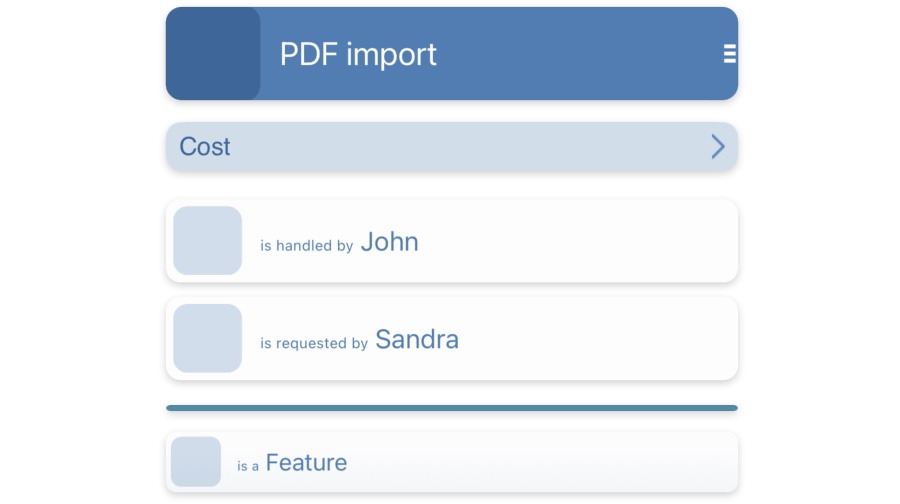
Reading from bottom to top, you can see that “PDF Import” is a feature, requested by Sandra, and being handled by John. You can also tap on “Cost” to assign any desired value. Additionally, you can further enrich these data by adding descriptions, images and documentation.
KeepLink is capable of much more than what has been demonstrated in this beginner’s guide to ontologies. The app supports advanced features such as tree structures, multiple inheritance, aggregations, etc. As you continue to explore and expand your ontologies with these advanced functionalities, you’ll unlock even greater the potential of your Knowledge Graph.
More on ontologies
As you become more familiar with ontologies and knowledge graphs, you may be interested in exploring these topics in greater depth. There is a wealth of information available to help you dive deeper into this world, as well as to understand their practical applications and benefits.
Here are some resources to help you expand your knowledge:
- W3C Web Ontology Language (OWL): The World Wide Web Consortium (W3C) has developed the Web Ontology Language (OWL) as a standard for creating and sharing ontologies. Visit the W3C’s OWL documentation to learn more about the language, its features, and how it can be used: https://www.w3.org/TR/owl-features/
- Semantic Web and Linked Data: The Semantic Web is an extension of the current web, aiming to make data more machine-readable and interconnected. Linked Data is a method for publishing structured data on the Semantic Web. Explore the Semantic Web and Linked Data concepts further at: https://www.w3.org/standards/semanticweb/
- Schema.org: Schema.org provides a shared vocabulary for structuring data on the web, which can be used to create ontologies. Visit Schema.org to learn more about their vocabulary and how to use it: https://schema.org/
- Stanford’s Introduction to Ontologies: Stanford University offers an in-depth introduction to ontologies, covering topics like ontology languages, modeling, and reasoning. Access their course materials at: https://web.stanford.edu/class/cs520/
By exploring these resources and others, you can deepen your understanding of ontologies and knowledge graphs, and learn how to harness their potential to improve data organization, retrieval, and decision-making in your projects and beyond.
Wrap up
This beginner’s guide to ontologies and knowledge graphs has introduced you to the concepts, and guided you through the process of creating a simple ontology. We’ve covered the essential elements such as creating types, properties, and links, as well as defining instances and their relationships. By following this step-by-step guide, you’ve gained an understanding of how to use KeepLink to design and utilize ontologies to represent relationships between different entities.